3 Tips to Improve Your Compositions in Post Processing
Creating meaningful and thoughtful compositions is the first step every photographer takes in creating a stunning landscape image. I talked about ways to improve your compositions while out in the field in one of my previous articles, but today I will discuss ways that you can improve your compositions in post processing.
It is always best to craft your composition out in the field, where you have the time and space to play around with all the elements and the environmental conditions in your scene. Once the exposure is fired, you are now left with significantly fewer variables to tweak and improve the image. This is why I want to stress the importance of getting the image as close to the way you want it interpreted as you can out in the field.
However, there are always those images that we spend tedious minutes composing, only to upload them to our computers and find distractions in the image that we did not notice when we were shooting. Sometimes it is just a small part of our image that needs attention, and other times it’s complete failure. So here are some tools that you have at your disposal to fix some of those issues.

1. Cropping
Cropping is perhaps the most powerful post processing tool you have. You can remove unwanted parts of your image, or even find compositions within your composition that you didn’t see out in the field. For this reason cropping is an extremely powerful tool. And don’t ever be afraid to lose a few megapixels in your image if it means creating a better composition. As long as the image size remains big enough for your intended use, go ahead and use this feature inside your editing suite.
2. Clone Brush
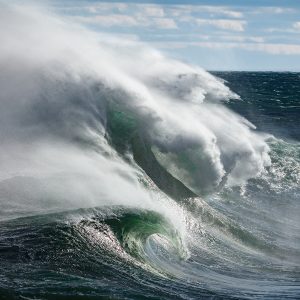
The clone brush (some editing programs might call this tool the spot remover or the clone tool) is really beneficial when you have accidentally left small distractions in your image. You can use the clone brush to easily and efficiently “erase” those small distractions. For example, if you are photographing near the ocean, sea spray can sometimes leave water droplets on your lens and the clone tool can help to remove them when you are editing. It’s not perfect, and can create some unusable results if the scene is too complex, but it is definitely a valuable too that you can use to help clean up your images!

3. Adjustment Brush
Last, but certainly not least, is the adjustment brush. The adjustment brush is perfect for selectively darkening or lightening any area of your image, or more commonly known as dodging and burning. This gives you immense power over what part you want the viewer to focus on, due to the fact that our eyes are usually drawn toward the brightest parts of an image. You can achieve this by darkening the areas of your image that are not important for the viewer to focus on and lightening those you do want your audience to spend their time viewing. The lighting conditions present in your image will help to dictate what should, or should not, be dodged and burned. The important thing to remember is to make sure the resulting image remains natural to the viewer.
Your editing suite is full of amazing features that can help you to bring out the best in your images, but these three stand out above all the rest when it comes to improving the composition of your images. So go give them a try and see for yourself how they can benefit you and your images!

Leave a Reply